When I set my 2017 goal of “Learn Web Design,” I wanted to do something creative. Because I spend all day building websites designed by others, I could learn more about how those designs came together and explore my artistic side. Earlier this year, I already redesigned at Spawning Tool and foodmarks. My last design project of the year is my last major website: this blog.
I forgot to take a “before” screenshot, but here’s roughly what it looked like using the “Twenty Fifteen” theme.
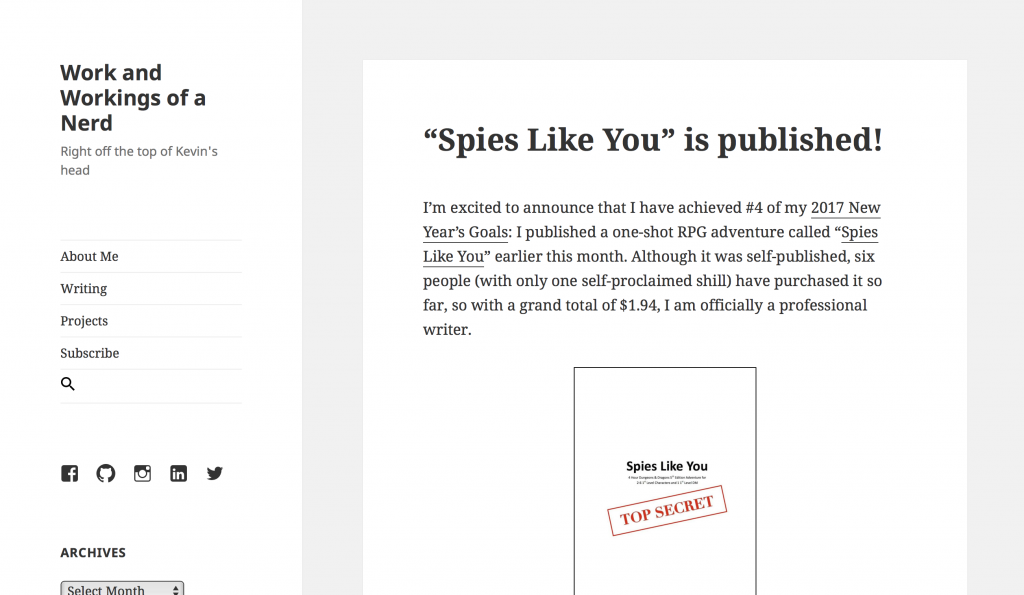
And here’s what it looks like now:

I’m not sure how authentic it is, but the design process I used has 4 steps:
- Concept. Figure out what to design.
- Research. Discover inspiration from other existing designs.
- Sketch. Explore a few different design directions.
- Implement. Actually build the result.
The Concept
I started this blog in 2005 on Blogger to just write about my high school life. Since then, I have acquired the kevinleung.com domain, moved it onto my own private server, added several non-blog pages about me, and updated the WordPress theme several times. Through all of those changes, I never thought about what I wanted my personal website to be about.
My coworker Kevin Chang once said, “If you’re designing for everyone, you’re designing for no one.” Designs need a clear purpose. A designer can make something look “good,” but the design can still fail if it doesn’t address the original purpose or need.
For my personal website, I just want to share what’s on my mind. This website is also not a portfolio or resume. I’m not trying to feature a brand, demo my skills, or get a job. The website’s intended audience are personal friends and family who happen to care about my mostly text-based, non-visual thoughts.
With that in mind, the blog is main focus of my website. It has a mishmash of topics, including cooking, games, travel, and technology, while being able none of them in particular. There is no blog topic, and I like the freedom of not needing distill my image at all. It hurts my growth in readership, but my target audience is small anyways.
In supporting this unfocused image, I also wanted to keep two other features. This website is my nexus on the web and should link out to the rest of my social media presence. It is also the repository of my past projects and features several I am particularly proud of.
Research
With that concept in mind, I found several active, personal websites, which are below in an informal blog roll :
I also searched for “best personal blogs” and “best personal blog WordPress themes” for examples outside of my personal network. I cobbled together what I knew about each of them to establish what their purpose was. For each, I deduced their purpose in having a website, analyzed how their design fit that purpose, identified common design trends, look at how they differed, and figured out what I liked. All of that provided some breadth of what I could accomplish.
Implementation
After doing the research, I felt like I had a vision in my for my blog and could sort out the details while I was building it. Since WordPress offers many built-in themes and a robust editor, I figured I could easily pick amongst options rather than designing from scratch. Here were the major updates.
1. Switch from the Twenty Fifteen to the Twenty Sixteen theme. Twenty Fifteen had two elements that I didn’t like. First, the content was broken up into boxes and containers on the page. That design works for sites that feature and need to distinguish different types of content, such as a publication. However, my site is just about a single blog with one flow of content. Twenty Sixteen has a flatter design that focuses on that continuous flow of information.
Second, Twenty Fifteen put the “Featured Image” above the title as the focal element for each post. It works for sites that have great photography, but my blog is non-visual. Twenty Sixteen puts the title back on top and includes the “Featured Image” with the post body.
2. Add a Subscribe via Email plugin. I broke my Google Analytics plugin earlier this year, so I don’t have hard data. Anecdotally, most of my target audience comes from Facebook with a few from RSS feed readers. Those sources continue to work well, but I realized I wasn’t reaching a large segment of my potential audience: my family.
Although I won’t print and mail blog posts to my grandpa, I can reach my family members who use technology but not social media. For example, my mom doesn’t use Facebook, and I’m almost certain that she doesn’t read my blog because she doesn’t know when I post. Instead, I can reach her with a mailing list since she does stay on top of her email. I put the signup form into the sidebar of the page.
3. Move the links to “Projects” and “Writing” into the site header. I wanted to retain links to past projects, but they are still secondary to my blog. In the page header, they are part of the site navigation if something is looking for it. However, once they scroll past the header, the user is exclusively focused upon blog content.
4. Changed the site to https. Julie commented that her phone had a big “Not Secure” note in the address bar because I was still using http://kevinleung.com. I used Let’s Encrypt to get an SSL certificate and make my site more secure.
5. Cleaning up the Categories and Tags on posts. Design not only covers the visual layout but also how the content fits into the site. To make older blog content easier to discover, I manually went through all of my old posts and annotated them with correct labels. Knowing that my blog is about everything and nothing, this should make it easier to find more content on a particular topic.
6. Use shorter snippets on future posts. Previously, I split a blog post when I launched into the first main point. I thought the guts of a blog post would hook the reader, but I think the home page will be more approachable to readers with shorter snippets. Publications use a byline or at most a paragraph, so that should be enough to hook a reader.
Sketching
With those changes, I thought the blog design was much improved. However, I had a nagging feeling that I hadn’t redesigned it the right way. I skipped sketching out options with pencil and paper. I had skipped the most creative part of the process that would lead to the best ideas.
So after implementation, I made 3 different sketches and liked one sketch that had the blog content without a sidebar. I didn’t use all of it, but it did make me re-evaluate what the sidebar was doing in the design. As it was, the sidebar physically took up a third of the horizontal space and felt like a major component that required attention. At that point, the sidebar had Social Media link, the Subscribe via email form, the search box, the blog archive dropdown, and the blog categories selection. I considered where each part really should belong in the layout.
First, I moved social media links into the site footer. My website was still the hub for my web presence, but the links shouldn’t take a reader’s attention. I really wanted my readers to focus on the blog. The WordPress theme had a built-in menu spot for social media links, so I moved those.
Second, I moved the search box into the site header. I use it myself but only when I’m looking for it: it isn’t important enough to put in front of users. I found a plugin that collapsed it down to the magnifying glass and put it alongside the other links.
Third, I moved the Archives and Categories into individual post footers. I’m not sure what they’re useful for, I didn’t have Google Analytics data to analyze for actual usage. These two parts are intended for browsing, but I cover that with the search box, pagination, and category links on individual posts. Since I’m so uncertain, I moved them to a low priority spot and will monitor analytics to see if users are seeking them anyways.
Fourth, I moved the email subscription form to a separate page. Many other sites feature it prominently their signup on every page or in a popup. However, I’m not actively trying to grow my readership or retain incidental users. My target audience is small and ideally would only use it once, so I made it accessible but out of the way by adding it to the header.
The Result
The final design isn’t too radical. In fact, it looks a lot like a blog from Medium or Svbtle with a mostly text on a white background. I’m sure those were a strong influence on my design, but it works well for my purpose. The important part for me is that I didn’t just use this concept: I came to this design deliberately.
There are several unaddressed aspects of the site. I still need to figure out what to do with the Archives and Categories and how to find older content. I also am not sure if I want to keep the title “Work and Workings of a Nerd.” I still need more information to make an educated decision about those elements.
So let me know what you think about the new blog design (and subscribe via email for more). I made these changes for my readers, and the design process doesn’t end at the first revision. It’s an iterative process of adapting to new information, and I’m open to all positive and negative feedback.
2 replies on “I Updated my Blog!”
In my last major redo of my web sites, I moved from a subscribe plugin to Mailchimp RSS-to-email. My low volumes are still in the free tier, and some load is taken of my servers. The plugin I was using hadn’t been updated for some time, so I made a big switch instead of a little one.
Since so many people now read on phone and tablet, I chose a Bootstrap theme, with the hopes of getting my WordPress and Drupal sites to look similar. It’s not 100%, but close enough to be bearable.
I also created feeds from Feedburner, as encouragement for people to take more load of my servers. Who knows how long Google will continue to support Feedburner, but at least there will be reversion to self hosted RSS if that happens.
Interesting! I guess the transition path to stay updated depends on what technology you’re currently on as well. I didn’t think too much about the responsive design for mobile since I figured that the WordPress theme would handle that for me.